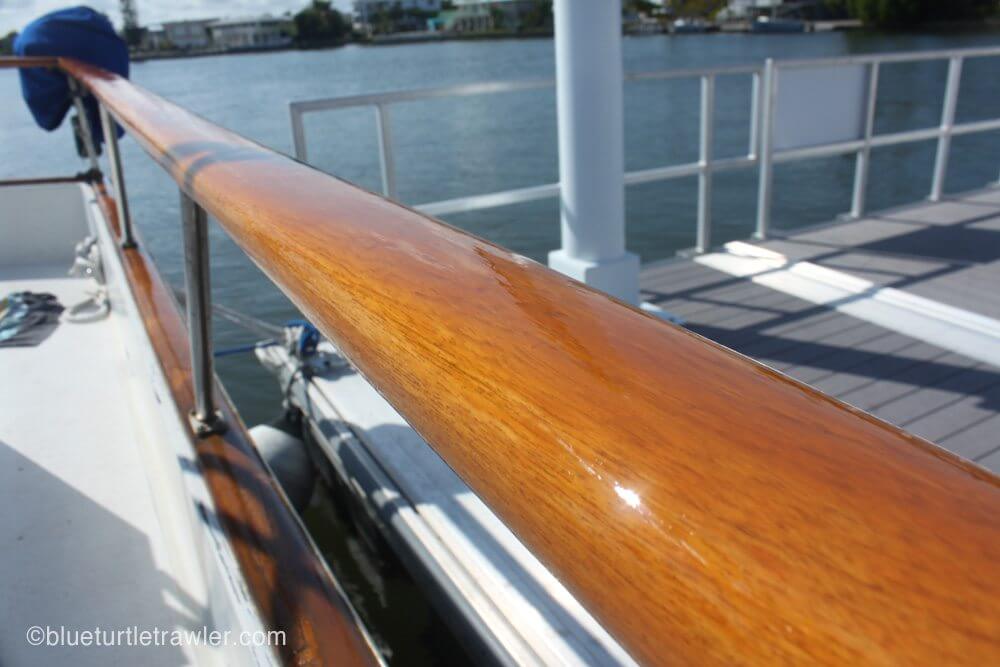
When Randy first took me to see Blue Turtle (back then, it was called Down Time), I fell in love instantly. Our De Fever is a classic trawler with beautiful lines and it had gorgeous wood inside and out. The wood sold me, it was so beautiful with the blonde colored rails that are lighter than you see on most boats. The previous owners had just had the exterior wood refinished with a maintenance coat and they looked amazing. I’m still in love with the Blue Turtle, but I now have a love/hate relationship with the exterior wood.
We had heard other boaters complain about the yearly maintenance that exterior wood required and some even warned us about it, but I thought I wouldn’t mind it. I actually love boat projects and enjoy taking this 1974 trawler and making her more beautiful. The issue is with the time involved with any boat project, especially wood maintenance. Randy and I talk all the time about how awesome it would be to refinish and refit Blue Turtle slowly over time—if only we were retired. Unfortunately, we are both busy working full-time and raising an 11 year old boy while trying to find time to get off the dock and have fun.
We’ve been putting maintenance coats on the exterior wood since we bought Blue Turtle. The last couple of years of hot Florida sun has taken its toll on the wood rails and each year we have some bare spots. Ideally, this year we should have sanded them down to bare wood, but neither Randy or I have the time involved with taking it down bare and then doing coat after coat of varnish. We will never have the time to do that until we retire, so each year this tedious chore creeps up on us and we begrudgingly go through the motions of the maintenance coats.
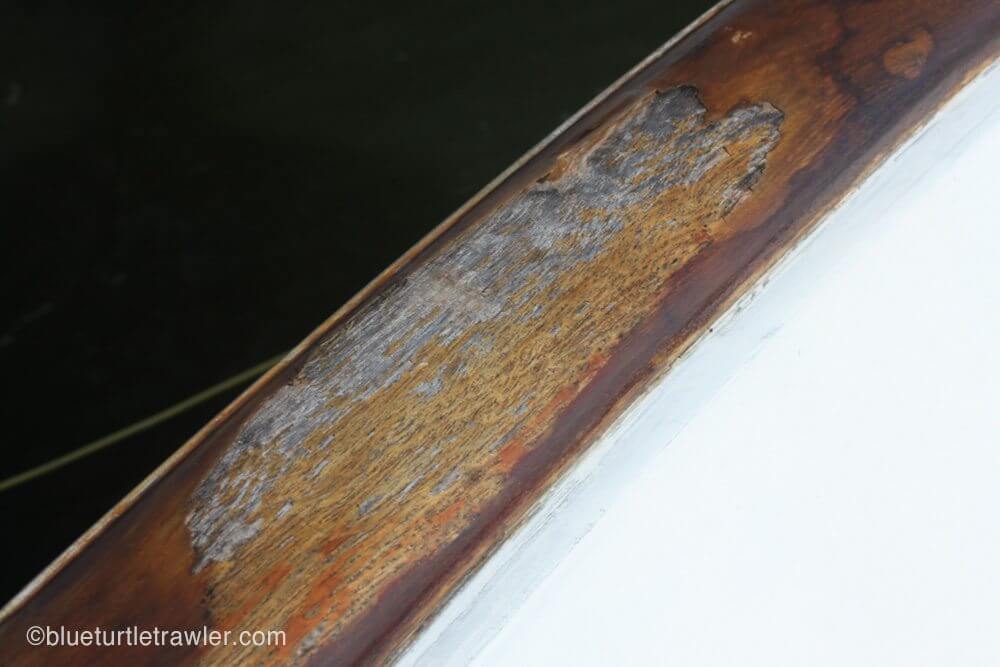


This year, we sanded the wood rails with 220 grit sandpaper. Mostly, we just scuffed the surface of the finish, but in the areas where we had bubbles and bare wood, we sanded a little harder to make it a smooth area in which we could brush with Cetol. While the “type A’ personality inside me wanted to take it bare and start over, the rational side said we don’t have the time. Our goal with the wood is not aesthetic, it’s simply protection—just trying to keep it coated and protected from rain and sun. As Randy and I worked the last week, we both stated over and over that this “would be our last boat with exterior wood.” I love the aesthetics that wood brings to a boat, but if we can get away with our next boat having little to no wood, we’ll be happy campers.
So, I guess the advice I can give to those with boat projects and limited time is that you should do your best to protect your boat and keep it maintained, but you also need to find time to live and enjoy the lifestyle and find balance, because with a boat, there’s always a gonna be a project.