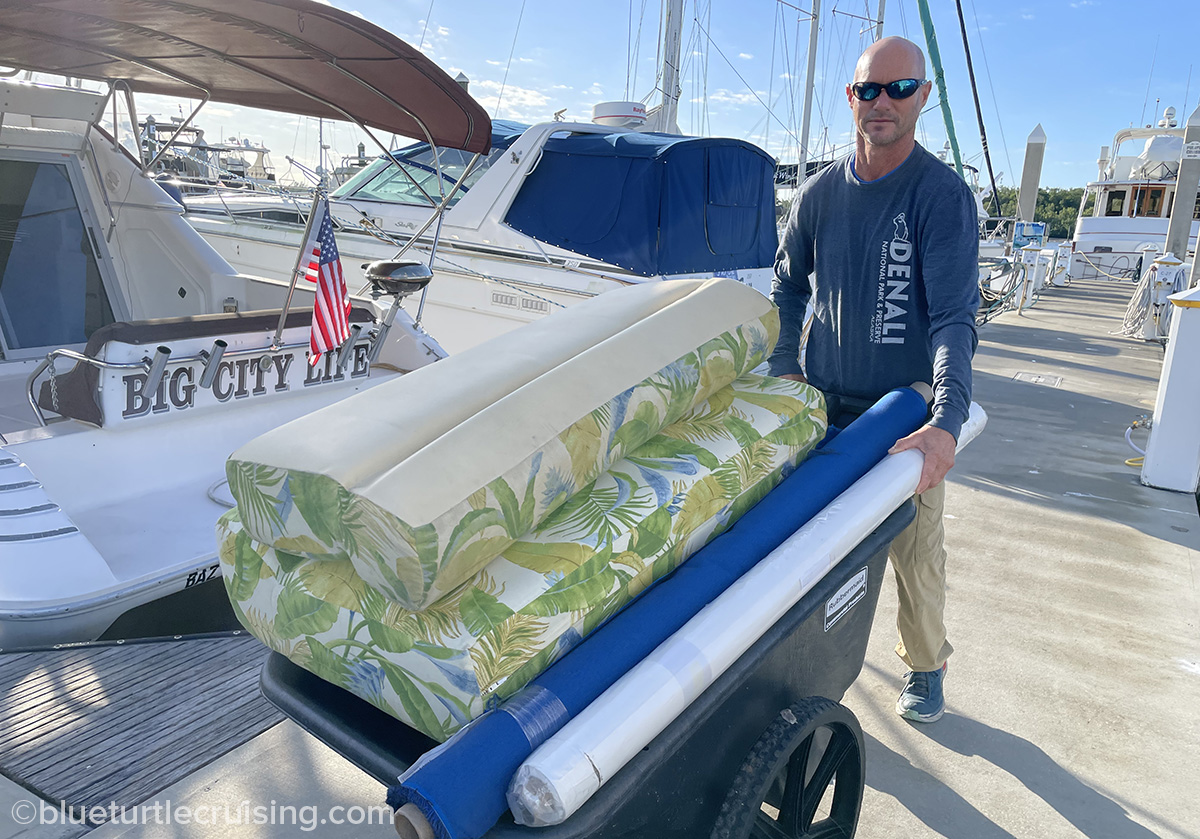
We’re in full-on project mode here on Blue Turtle and one of the items on my list of to-do’s was to recover our interior boat cushions. And these cushions are no ordinary, simple flat boat cushions, these are bolstered and super thick with multiple zippers AND in “L” shapes as well. Talk about a project! Did I mention that I didn’t know how to sew?

I decided when we bought our sailboat that we would invest in a Sailrite sewing machine and I would learn to sew. With all the canvas covers, sails and cushions on board that would eventually need to replaced, it would cost a small fortune to have it all done. Given that I’m a bit crafty by nature, and the fact that my mother had a Sailrite machine and knows how to sew, I figured I could learn. Plus, there’s always Google.
Sailrite Ultrafeed LSZ-1 – A.K.A “The BEAST”
I had purchased my Sailrite Ultrafeed LSZ-1 back in October and ordered the materials needed. I went with the LSZ-1 since it could do a zig zag stitch in case I ever needed to repair a sail. The Sunbrella upholstery fabric I ordered was on backorder and would take a couple months to receive. This gave me plenty of time to get acquainted with the machine and learn to set it up. Sailrite does a fantastic job with their video tutorials and have an entire series showing you how to set up, operate and troubleshoot using their machines. They also have a ton of DIY video tutorials on everything from boat interior upholstery and window shades & curtains to exterior vinyl seat coverings, hatch and companionway covers to canvas biminis and sail covers. I originally purchased the Ultrafeed® LSZ-1 BASIC package as a refurb. It was brand new and was supposed to have a paint defect although I have never found it. The Basic package does not come with a case, something I overlooked when I bought it. I ended up purchasing the heavy-duty case separate since we would be storing the machine on the boat and I didn’t want it to get damaged. The machine with the case weighs in around 66lbs. It is a BEAST. As my father would say, “You could sew 2 quarters together with this machine.” To say I’m thoroughly impressed is an understatement.

Deconstructing the old cushion covers
You could tell our boat’s old settee cushions were professionally done. The sewing was great quality but the fabric had gotten worn and stained and in some areas (inside the cushions) it was beginning to fray and fall apart. My mother and I invaded my sister’s house (since I’m on a boat and they’re on an RV) the first couple of days to work on her dining room table. I picked the simplest, smallest cushion to start with and we removed the cover. We realized that besides the exterior zipper that holds the cushions in, there was yet another zipper inside that encased the bolster. OH BOY, what did I get myself into?
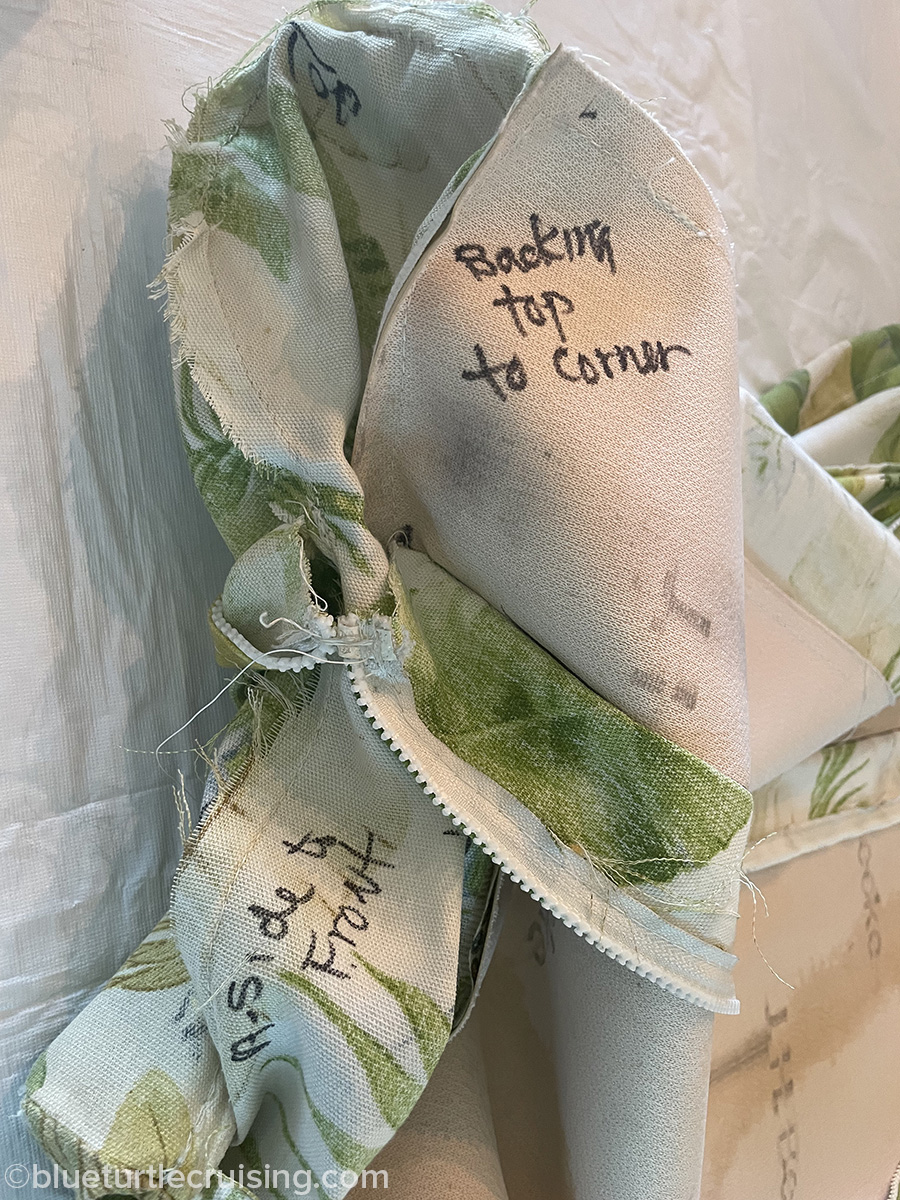
Before we started ripping seams and taking it apart to use as a pattern, we used a sharpie marker to write on the old fabric what parts match up with what – that way we would know how to sew it back together. Once the pieces were all separated and the fabric cut, it was time to sew. My mom was such a HUGE help showing me the whole process of making patterns and sewing it together. There was a lot of hand holding with the first cushion (which took me 2 full days to make) but by the time I got to the second and third I felt I had the hang of it.


Operation RV workshop
With 2 days gone and only 1 cushion made, we decided to move the operation to my parent’s RV and set up shop there. This way, Randy and I could stay the night giving my mom and I more time to work on the sewing (saving us the commute to my sisters). We set up a table outside and used their patio mat to lay out fabric and cut patterns. My mom would help rip out the seams of the old covers while I worked on sewing the new ones. It was. exhausting work that took 7 full days to complete. The hardest part was usually trying get the foam cushions back into the new covers. We needed Randy to help muscle the foam into place and at times he looked like he was wrestling an alligator on the floor instead of a cushion.
One afternoon while mom and I sewed, my dad helped Randy make a new snubber for our boat. We needed a new one made since the one from the trawler didn’t work on the sailboat. My dad made the last snubber we had so we bought the materials and parts and Randy watched as my dad wove the rope around the shackles. It was nice to get an extra project checked off our list!


The final result
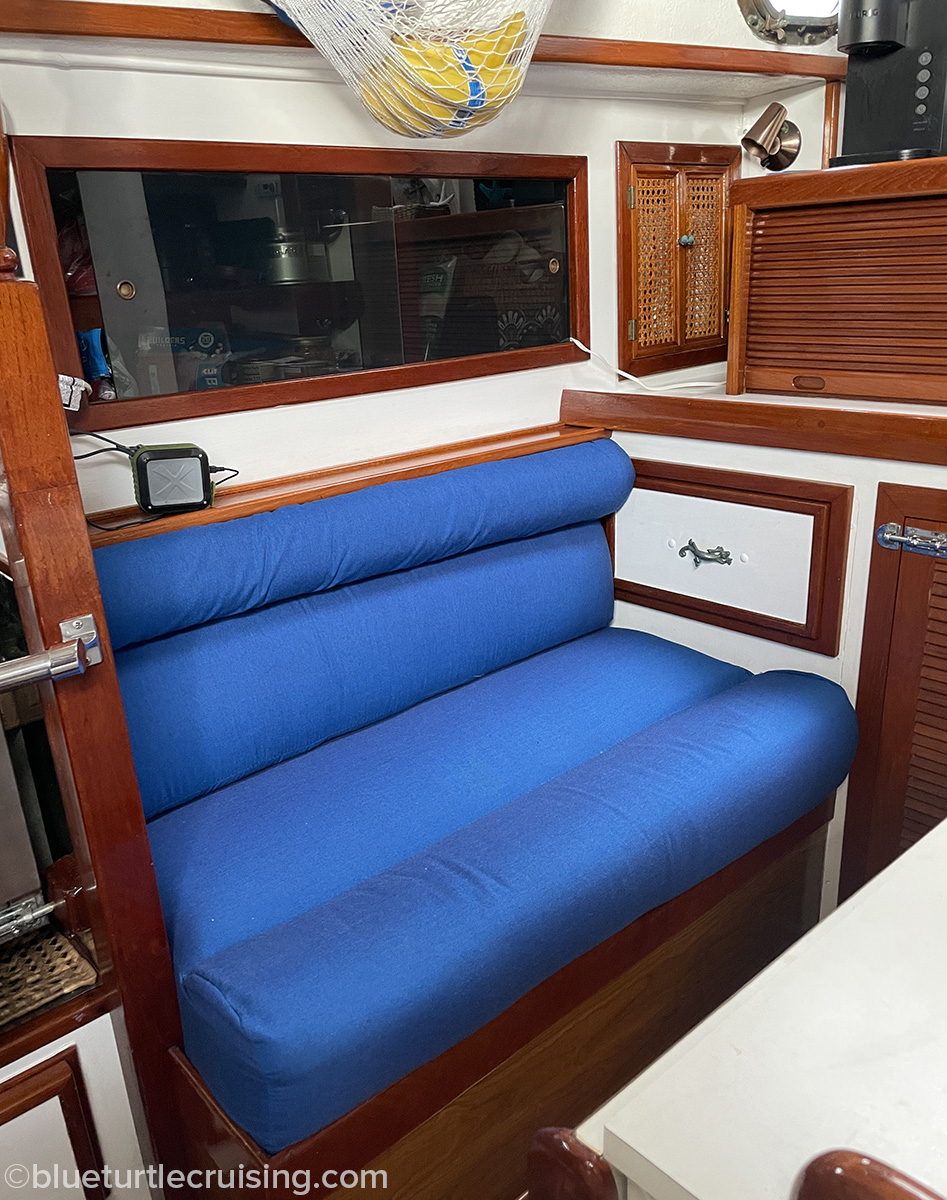
Finally the cushions were complete. What a project! I have to admit that, at times, there were some melt downs, curse words and hair pulling. I couldn’t have done this without the help of my mom. Why I decided to tackle such a tough project for my first time sewing is beyond me, but I feel that after that ordeal, hatch covers and other things will seem easy. The finished result isn’t professionally perfect by any stretch but what I learned will save us thousands as I get better and sewing most items on the boat. I think overall the cushions came out great. The vibrant blue Sunbrella upholstery fabric brightens up the cabin and gives it a cleaner look. What do you think?


So proud of you. Cushions look great. I only wish you could have seen Ronnie in the Rio Dolce River in Guatemala when he delivered them one at a time over his shoulder while he paddled his Cayuga. He made the cushion custom and I brought the fabric from home. So happy to see you loving “Her” as we did.
Thanks Cindy! I bet that would have been pretty amazing. He did a fabulous job. I could tell by the stitching. We love “Her” and are taking great care of her. Can’t wait to start cruising full time!
Great article! The new cushions look great. I also admire your selection in your sail boat. Have great adventures.
Pat, Michigan City, Indiana
[email protected]
Thanks Pat!
Cush, cush, cush! Mom’s are great!